17 May 2015

Dave's mobile doggy compartment

Dave wants one of the compartments in his truck to be doggy-friendly, so we took the ute on into the workshop and added a few windows and an air vent.

Dave thinking like a dog. "Where would I want to see out??"
We cut a massive hole in the front so the puppy-brain can see Dave in the cab, see forward, and get some natural light.
Then slapped in a piece of polycarb', sealed up with silicone, and bolted in down.
A small louver air vent already exists in the front panel, but it's pretty small. We put a whopping big hole in the ceiling for more airflow.
And then slapped a great little water-diverting venturi canopy on top.
Here's Dave inside with the doors closed, checking for potential puppy happiness factors.
He decided we needed more visibility out. So another hole goes in the side.
We put some smoked polycarb' in the side door, so you can't really see in, but looking out is fine.
Looks nice 'n neat. Plenty of light and airflow inside. Simply cannot see in from the outside. Job done.
Here's Ruby inside at night. The internal light is on, otherwise you'd never see her.

09 May 2015

Gizmos on display

An old engraving tool that burned out. The motor rotor is kinda interesting, and spins on it's original bearings which are mounted in the small wooden brackets. Makes explanations of electrical magnetism far more interesting for the kids when it's hands-on.
Garrick really enjoyed the wall mounted engraver guts, so I decided to repeat the process with a modern 5.25' platter drive and an SSD. Lots of questions about how these work!! :D My fridge is covered in old HD magnets, so this was all the more interesting for him to investigate.

21 March 2015

Just another hard rubbish refurb


Another hard rubbish pickup, I couldn't pass this one by. Full solid timber on all sides, all drawers, including the drawer floors. The drawer runners were absolutely SMASHED to pieces. This was a massive rebuild job, and an extra ordinary amount of sanding required. This dresser had seen a lot of abuse. It's incredible how well solid timber comes up after being stripped back though. Wish I'd taken better rebuild photos, I forgot to take shots at a number of steps.

Garrick helped me pull out HUNDREDS of brad-nails. (small nail gun nails) The dudes at the factory must've been bananas.
The original build was garbage. I pulled the entire front face, and all the drawer runners out. This staple-construction is just so bad. So wrong. Makes me cry.
Not really shown here, but I've rebuilt and reinforced the entire front. I've rebuilt all the drawer runners which are sitting on the top. The sides and top are pretty beat up. The existing stain on it is what I call "mud finish" which is a single coat spray-stain-varnish. Looks terribad. The difference between that, and what I'm about to do to it with separate processes and the same colors is night and day.

Top done, walnut stain, x2 coats of varnish. Sorry didn't get any shots of it completely stripped back. Took an enormous amount of sanding to get the mud-finish off. Looks sooooooo good when it's plain white pine. I'm never entirely sure I should use stain at all.
Looks great. I installed small 50mm castors on the base so I can move it around. I actually didn't do any work on the drawers, so they're a slight color/gloss mismatch, and I will need to reglue them over time. Amasing condition considering how bad the main dresser was.
An old table refurb in the background. That was mud-finished originally also. Decided to oil and wax that one after stripping it down though. The chairs (and stools!!) are rubbish collected as well. :D

01 January 2015

Beyblades Arena


I made a Beyblades Arena for Garrick for Christmas. It works ok...

I made some parts.
I painted some parts.
I drew the floor down to create a concave surface for the Tops to gravitate into.
You can see the curvature of the floor here.
I put some recycled tyre rubber strips on the bottom with hot glue.

It looks pretty cool. The outer ring comes off so you can play with a "ring-out" style if desired. (See the side-view picture showing the curve of the floor)

25 December 2014

Wooden Rings


Study group did the same Christmas Breakup party theme thing again this year as last; recycled / home made / fair trade etc... so I decided to try my hand at some hand shaped wooden rings for the semi-secret-but-not-really-Santa.

I ripped down some strips of timber of contrasting colors that I'd saved from a previous year's tear-down of pallet timber. I want to throw some aluminium into the mix for some shiny-bling.
Can only rip down to ~3mm on the table saw, so I'm sanding down to ~1.5mm with the sander as I don't own a thickness planer.
x2 boards = 3.4mm thick...that'll do.
Cut a manageable piece.
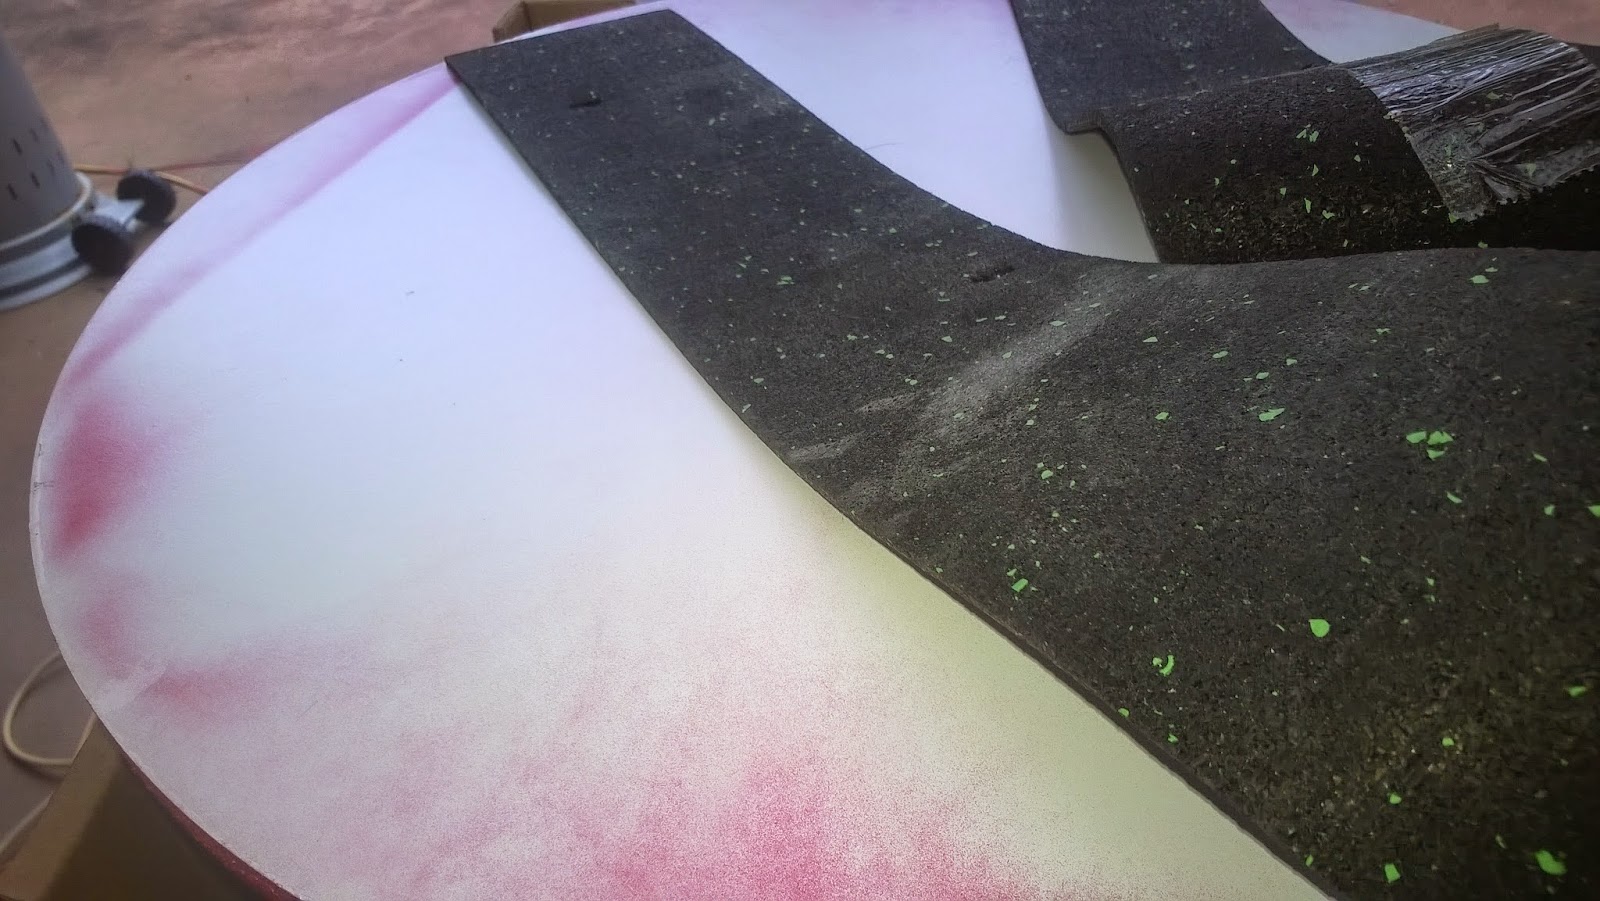
Proposed ring profile laminations. You can see here I've got x4 layers put aside in case the aluminium doesn't work out, and I have to revert back to pure timber assembly.
Some tools required to continue.
Araldite straight onto aluminium without roughing it up or anything. I have experience with this, so actually performing this step in this fashion is completely beyond my comprehension...it was a hot day...
Keep adding laminate layers. I'm running all the grain in the same direction for the aluminium version.
Clamp it up!!
Some tools required for the next step.
I don't have the drill bit sizes I need for the inner or outer diameters, so I'm gonna hog it out with a perimeter cut using a smaller drill bit.
Rough cut out with the band saw.
Really happy with the way it's coming out at this stage.
And not so happy at this stage. Every punch-out of the aluminium pryed it apart a little more.
Abort mission and try one of the little rings. The grinder bit was worthless against soft aluminium or wood.
So I wrapped some sandpaper around a 7mm drill bit. That was useless also.
...and then it all went even more pear-shaped. This laminate isn't going to work. I actually tried three times with the aluminium and various re-glue attempts. It continuously separated.
So I moved over to the backup laminate I'd prepared. Each layer has the grain running 90 degrees to the last. No aluminium core.
Rough cuts. The center holes are hogged out with an aggressive engraving bit. Worked really well, made smooth cuts. You almost can't tell they weren't cut with a correct drill bit.
I borrowed Wes's mini strip sander.
Rough sand vs. square cut.
More sanding to go. Right hand set are spares in case of crumble during final sanding.
So I finished sanding. Oiled them, and wax/polished them. I made a tiny black acrylic stand to set them into, and gave them away.

/tears.

12 November 2014

Invisible wallet killer


I had a great result and achieved my lowest average kwH electricity use in my last bill. 5.3 is way, way below the average for 2 adults, even for conscientious users. We're in the range of 3-4 times less power used.

You'll notice the big dip after summer. Skev moved out at the end of December, and Jana moved in. We had a really hot summer so I did run the air-con pretty hard. However after that, lifestyles show a big result.

Back when Skev was working, we were averaging ~6+ kwH, however during this bill snapshot Skev was taking an extended break from work. Between 14-18hrs / day he used his PC. He's an online machine. The problem is, he's got an older monitor, and slightly older power supply. His system draws ~450 watts when fairly idle, and 550+ when gaming. For those not in the know, that's fairly normal for 3-5yr old computer devices, and on a par with running a small washing machine. By comparison, my 1+yr old monitor (LCD vs LED) draws 1/10th that of his monitor at only ~22watts, and I've paid extra for 80plus certified power supplies for some time now.

Given what I'd learned in 2008, his use is not really abnormal for any household. If anything, all he really did was offset on-demand-but-off-devices two fold which I'd worked out as ~200 watts back then.

So Jana's daily routine closely mimics mine. Work most days. Heavy online user at home. Mostly efficient, or portable devices.

The story here is that not Trav was bad. It's that lifestyle itself plays a DRAMATIC role in your participation in Global Climate control and the cost of your power bill. The options against Trav's use were abundant. Use the PC less (poor solution), or swap out older electronics. Of course, there are issues with simply dumping working electronics, and driving various levels of consumerism simply by upgrading, however the components could have been relegated to a lesser-used service in our house such as a secondary monitor or to one of my ...uhh...several old test machines which aren't used that often etc.

Moral of the story: Make some effort. Review your habits occasionally. Lower your bills. Learn Kung Fu.

05 October 2014

Upgraded shoe shelves

I've moved house. The old set of shoe-shelves needed to be turned 90 degrees on their side to fit into the new entry space.

It previously had x6 long shelf cavities, but now they're oriented in an unusable fashion. I've added x12 shelves to make an 18 hole space. You can make out the original shape vs my additions by following the exposed faces. Lots of measuring and drilling required for the shelf support pins, but overall an extremely simple change. I'll run some white paint across the exposed shelf ends as I can't justify the cost of melamine strip for this old hard rubbish pickup.